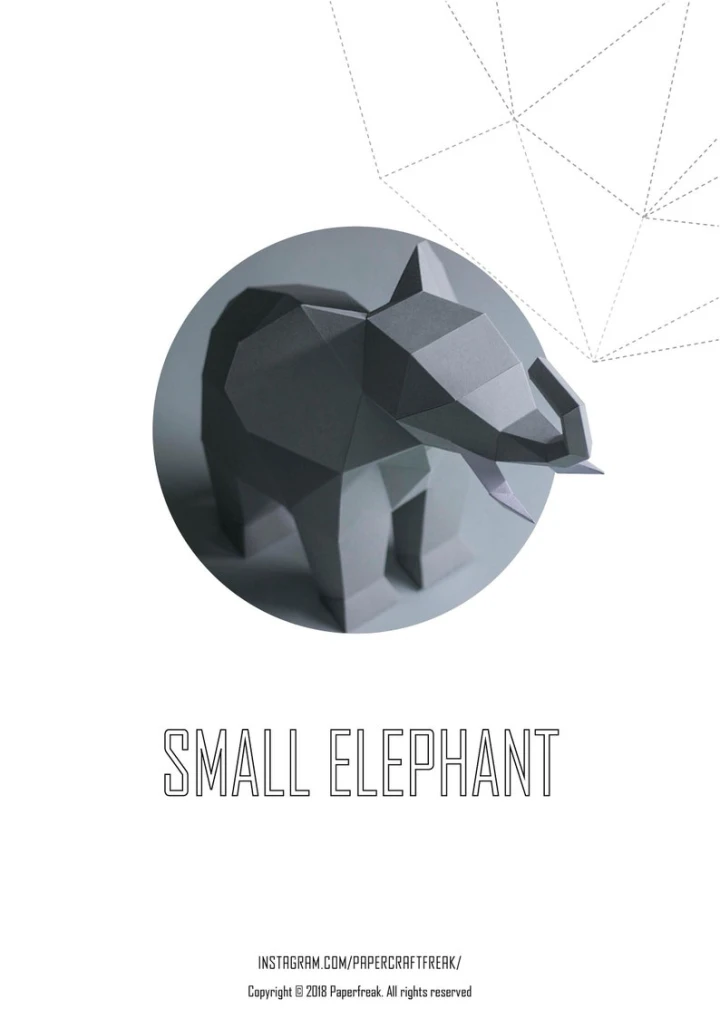
Papercraft 3D ELEPHANT SMALL Low Poly Paper Sculpture DIY Decor for home nursery office pepakura pattern template handmade animals
| Digital download | |
| Digital file type(s): 1 PDF | |
| Support for file crafts: PDF Vector | |
| Height: 270 milimeters | |
| Width: 196 milimeters | |
| Depth: 372 milimeters |
3d papercraft small elephant. pepakura template, pattern for self-assembly polygonal elephant for decoration home, loft and office
Papercraft elephant art low poly paper figure.
this is PDF pattern ! not ready made model !
Template included detailed instruction for beginers
For assembling. Print this pattern on 8 sheets paper or cardstock size A4 or letter density 160g-300g / 90lb-120lbs scale 100%
Dimensions of this figure in the assembled form
Size for A4 or letter
Hight- 270mm (10,62 inch)
Depth- 372mm (14,6 inch)
Width- 196mm (7,71 inch)
If you want to make model more in size, print the pattern on a3 size paper and scale up to 145%.
color scheme
sheet 1-8 gray
you can use your favorite color try to experiment!
Use this step by step guide for best result
Step 1
Start the assembly from the tip of the trunk (part 1) and glue the parts according to the large numbers until you reach the detail 5.
Glue the tusks (6 and 7) and paste them into the resulting design.
Step 2
Continue to glue the items according to the large numbers until you reach the detail 10.
Now glue the ears (11-12) and glue them to the model.
Continue to glue the details according to the big numbers until you reach the detail 15.
Step 3
Now collect the legs from the foot and paste them into the figure. Continue to stick parts until you reach the details 20.
Glue the tail(21a) to the back of the elephant(21B) and glue the resulting structure to the figure.
Step 4
Glue the part 22, then collect one leg from the foot and paste it into the figure. Next, glue the part 24 and complete the assembly by gluing the part 25. at the very end, glue the polygon with the signed "last detail".
Step 5
Take a picture of the finished work and share in social networks. Please mark me on the photo @papercraftfreak and use a hashtag #papercraftfreak
Assembly tips
If you want to make tusks of a different color, print sheet 1 repeatedly on the paper of the required color
It is recommended to finish the assembly on the back leg. Follow the big numbers and you will succeed
Every detail has its own number with large symbols. Follow these numbers for your convenience.
Enjoy it !
If you want to make model more in size, type the pattern on a3 size paper and scale up to 140%.
Your files will be available to download once payment is confirmed.
Instant download items don’t accept returns, exchanges or cancellations. Please contact the seller about any problems with your order.


